Table of contents
- Replacing worn out 2 inch pipe boot
- Electrical pole gets new retro fit rubber boot
- Bottom of panels screwed down
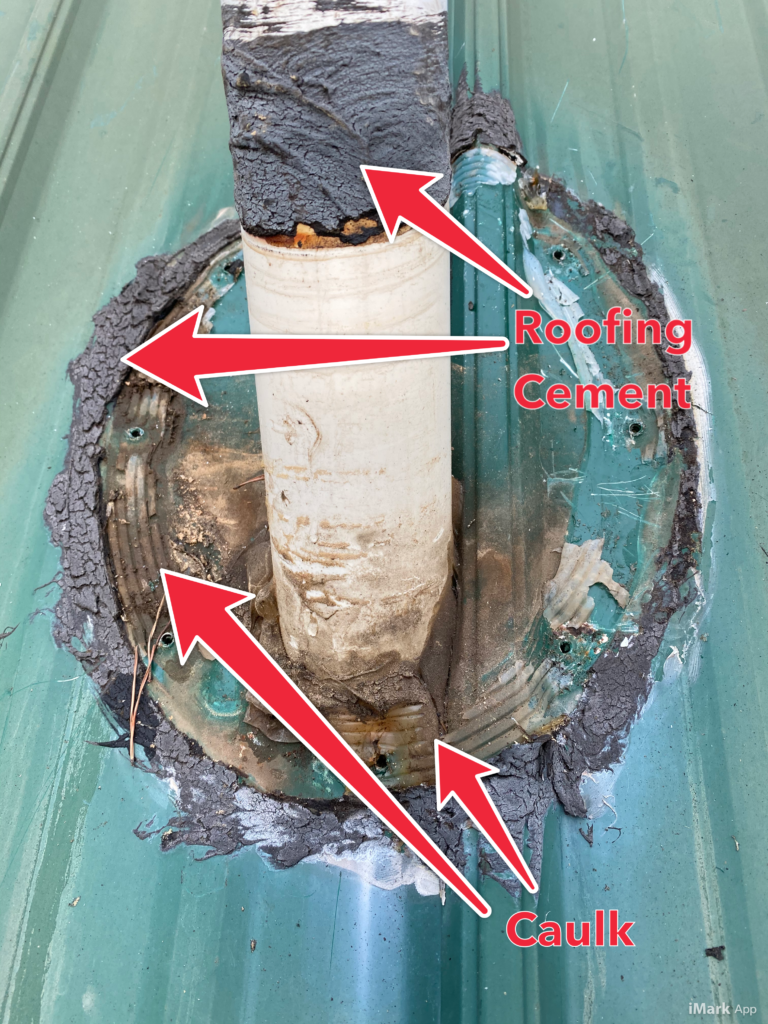
- 1Replacing worn out 2 inch pipe boot
Once the old pipe boot was removed we had to clean off / scrape off as much of the old caulk and roofing cement as possible. There are old caulk and roofing cement that has to be removed from the roof but you want to prevent scratching the paint off the metal. Then we used a cleaning agent on the metal.
 Go To Pin
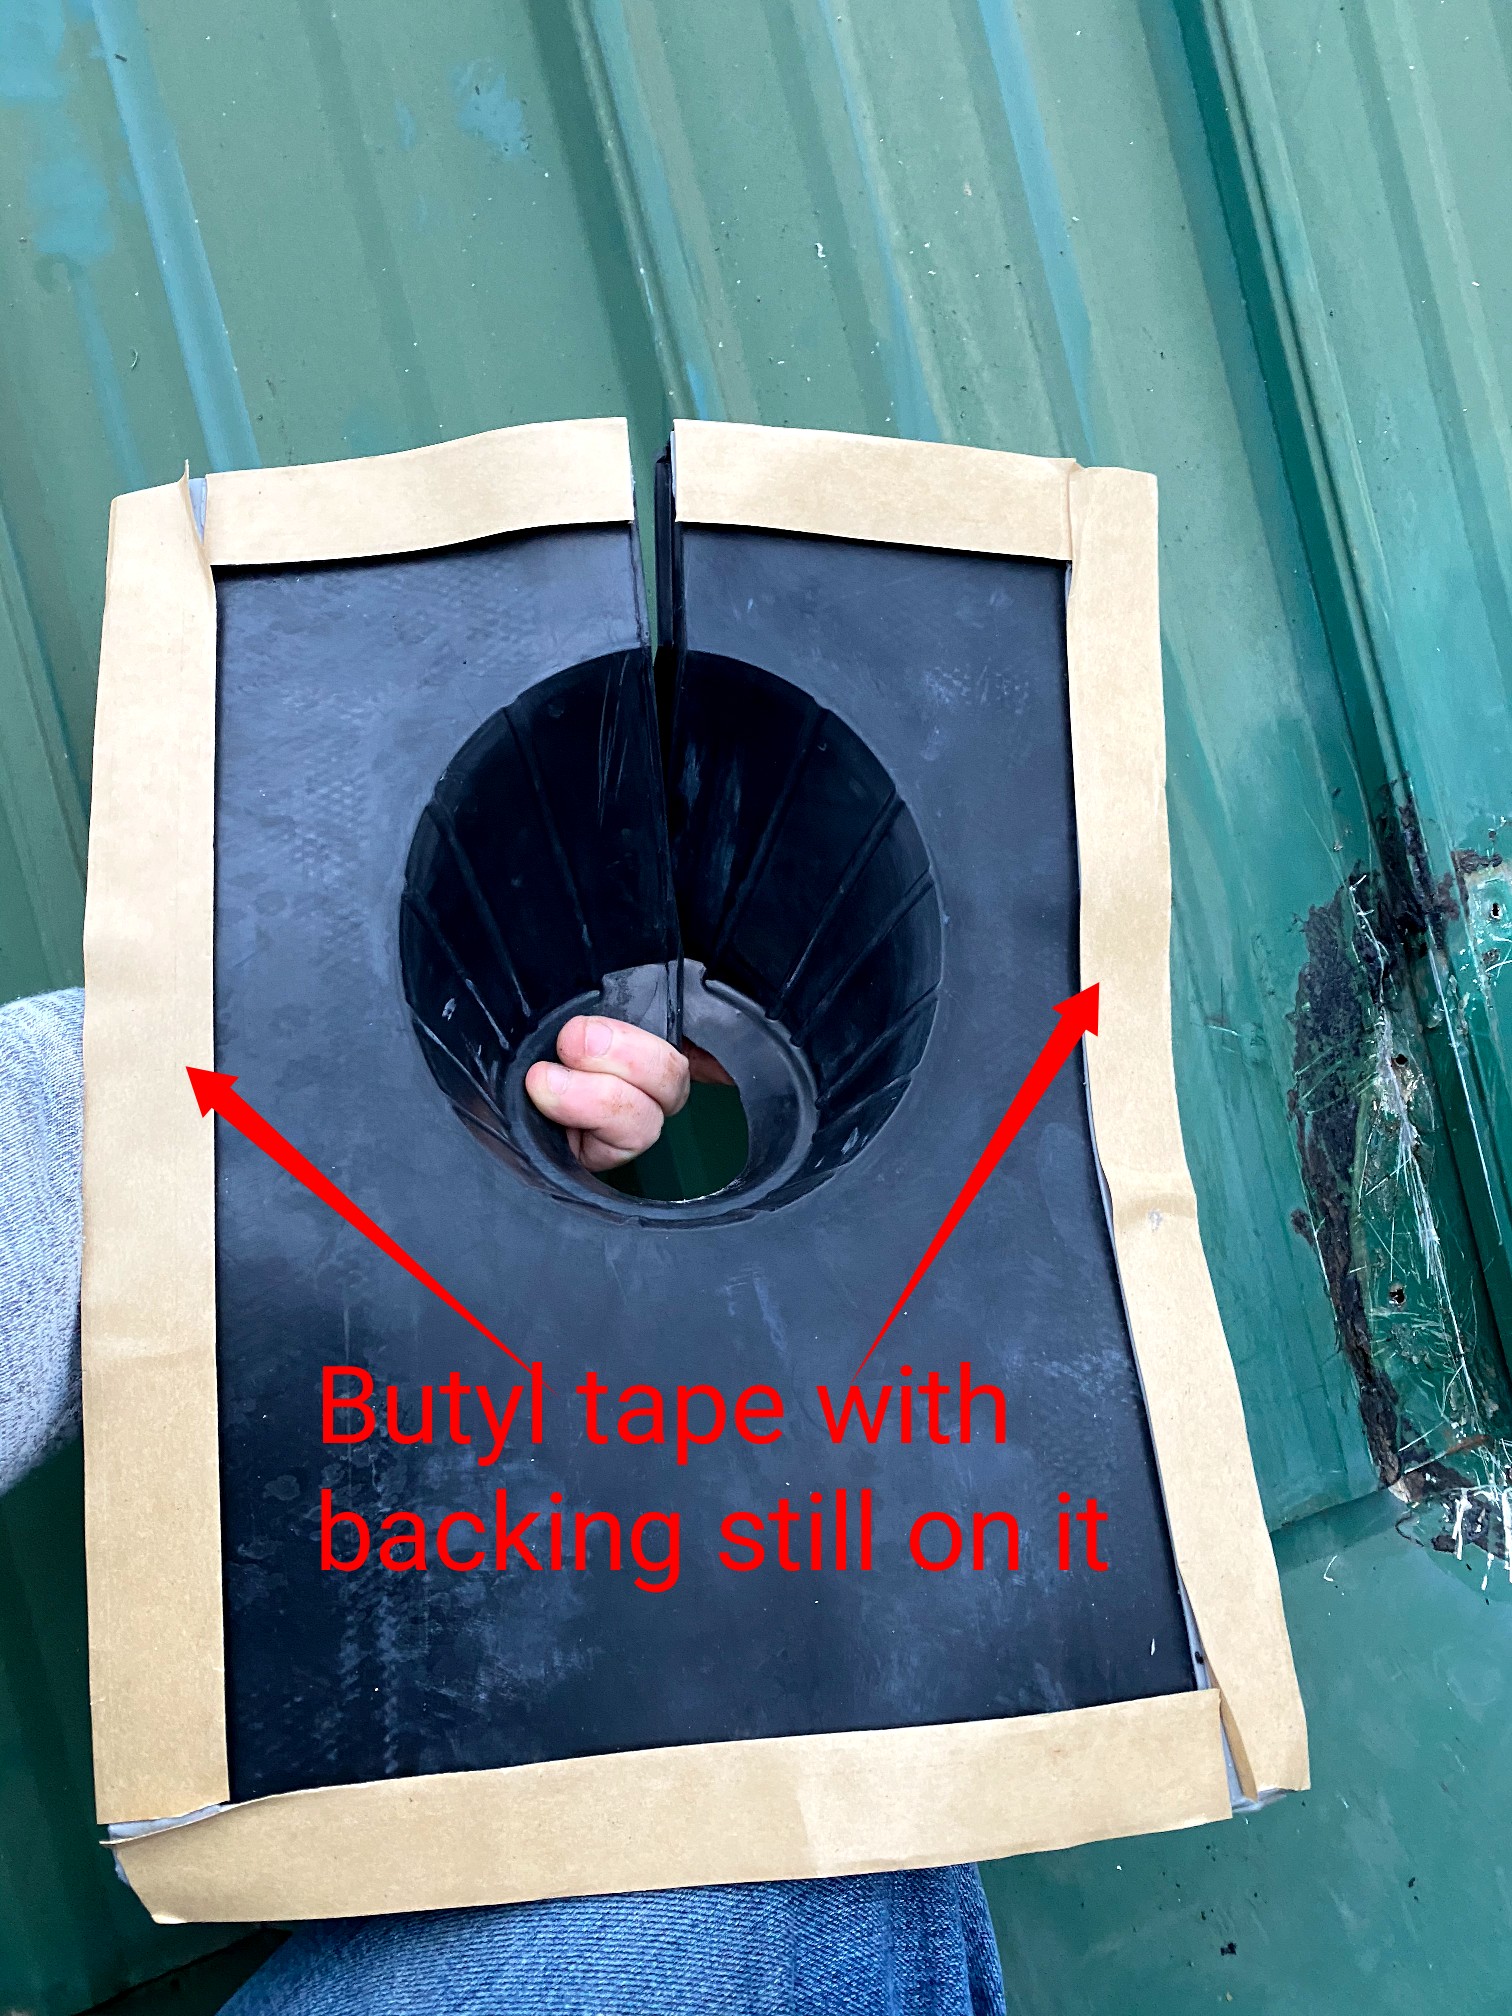
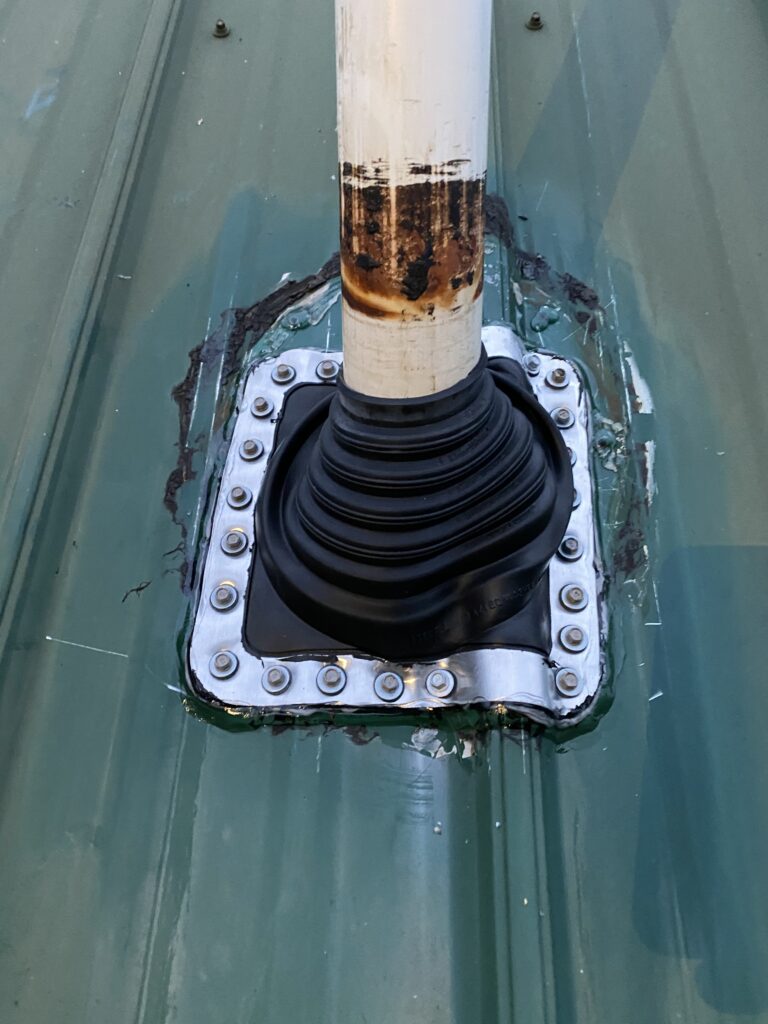
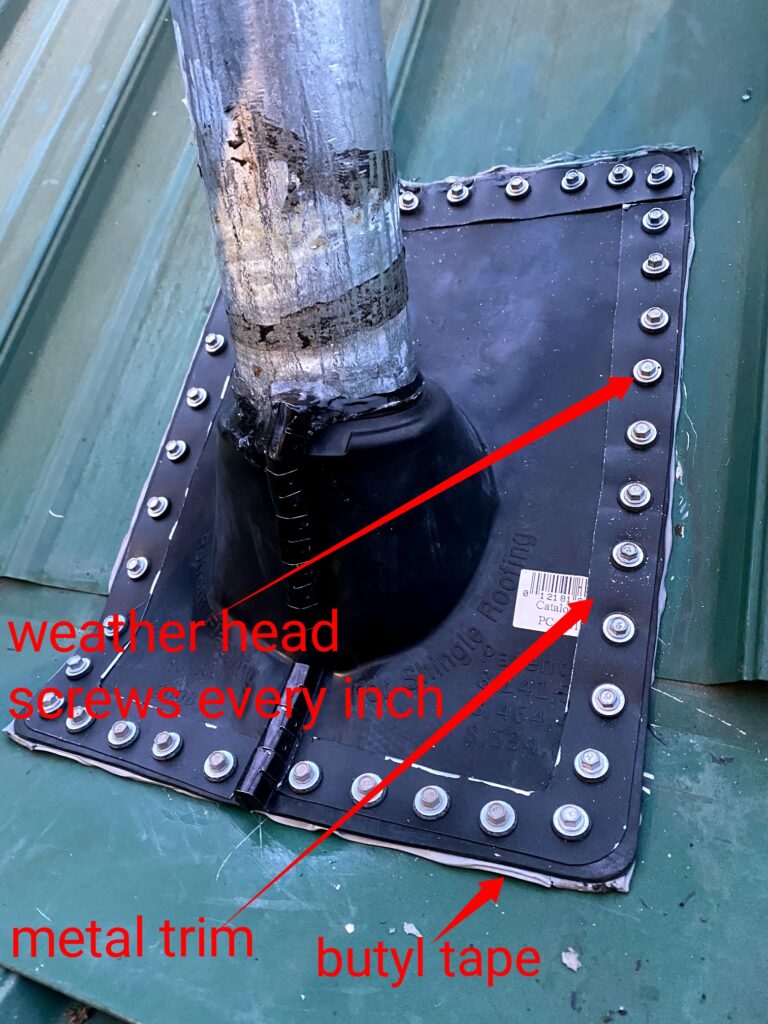
 - 2Electrical pole gets new retro fit rubber bootThis electrical pole was tricky as most split boots or retro boots for metal roofs were too small due to the fact of where this came through the roof right at a pitching change. So we used a larger rubber boot and outlined the top with a sturdy metal to screw through so the screws wouldn’t punch through the rubber boot. I was very pleased with how this turned out. We also used butyl tape on the bottom of both pipe boots. A lot of people just put caulk on them and screw them down. Butyl will last much longer than caulk and create a better water-tight seal. Caulk is only used as a secondary measure of protection.
 Go To Pin
 - 3Bottom of panels screwed down
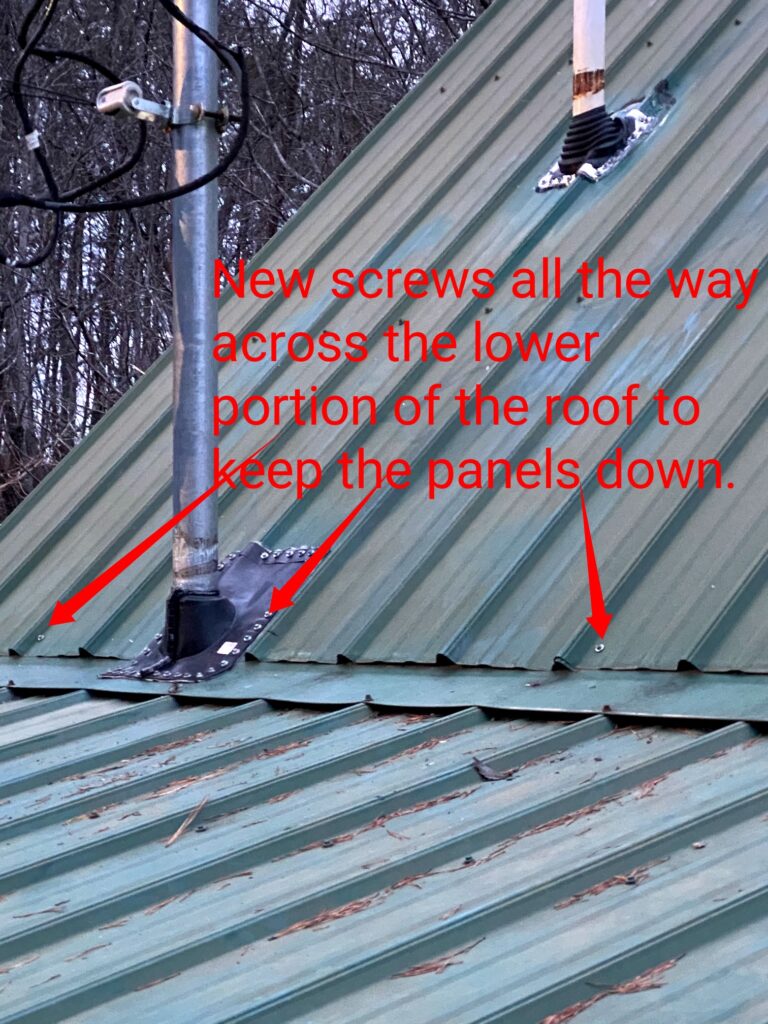
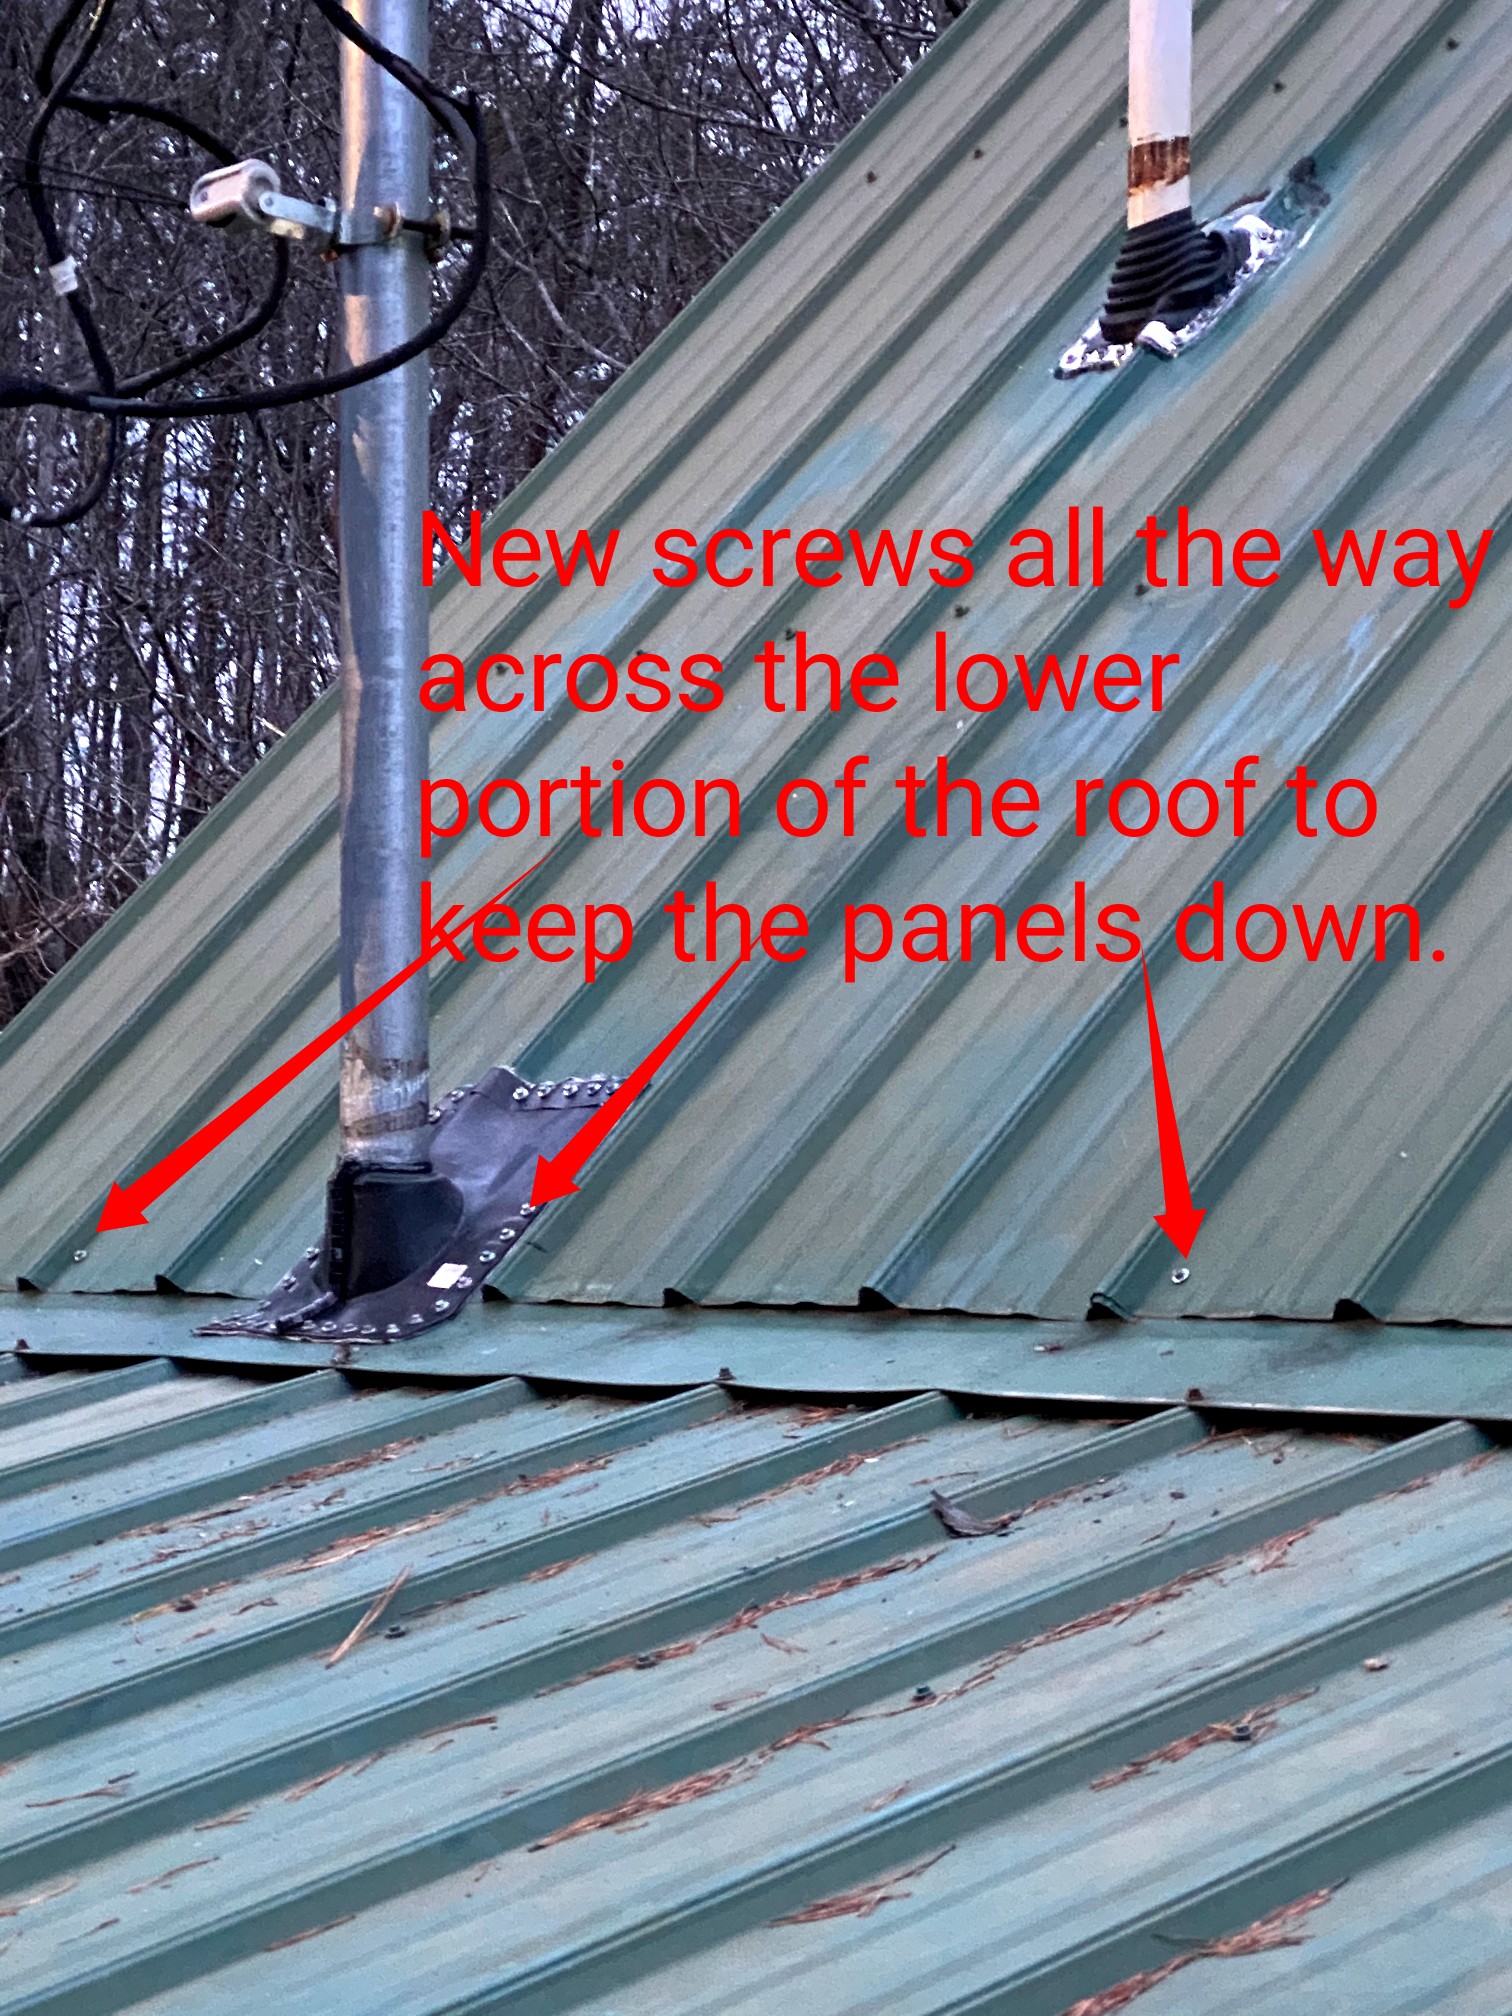
As you can see in this picture the red arrows are point to the screws we added to keep the metal panels from flapping in the wind and letting water in.
Go To Pin